拙著(以下,教科書と表記)「ROS2とPythonで作って学ぶAIロボット入門」(講談社)を授業で使用する場合の講義資料のたたき台です. 6章マニピュレーションの補足記事です.P192のsimple_armをプログラムで動かすサンプルです.
参考サイト
コード
import rclpy
from rclpy.node import Node
from rclpy.duration import Duration
from sensor_msgs.msg import JointState
import time
import threading


# Simple arm用のクラス
class Commander(Node):

    def __init__(self):
        super().__init__('commander')
        # パブリッシャの生成
        self.publisher_joint = self.create_publisher(JointState, 'joint_states', 10)

    def publish_joint(self, joint_name, q):
        msg = JointState()
        msg.header.stamp = self.get_clock().now().to_msg()
        msg.name = [joint_name]  # nameはリストでないとだめなので[]を付けている
        msg.position = [q]       # positionもリスト
        self.publisher_joint.publish(msg)
        self.get_logger().info('Publishing: "%s"' % msg)


def main(args=None):
    rclpy.init(args=args) # 初期化
    commander = Commander() #  ノードの作成

    # 別のスレッドでrclpy.spin()を実行してコールバック関数を呼び出す
    thread = threading.Thread(
        target=rclpy.spin, args=(commander, ), daemon=True)
    thread.start()

    time.sleep(1.0) # 1秒待つ

    # 目標角度の設定
    target_joint1 = 0.0
    target_joint2 = 0.0

    commander.publish_joint('joint1',target_joint1)
    commander.publish_joint('joint2',target_joint2)

    print('Move: Input 1, 2, 3, 4 key')
    print('Space: Initial position')
    print('Esc: Quit')

    try:
        while rclpy.ok():
            c = input()

            # 押されたキーによって場合分けして処理
            if c == '1':
                target_joint1 -= 0.1
            elif c == '2':
                target_joint1 += 0.1
            elif c == '3':
                target_joint2 -= 0.1
            elif c == '4':
                target_joint2 += 0.1
            elif c == ' ':  # Space key
                target_joint1 = 0.0
                target_joint2 = 0.0
            elif ord(c) == 27:  # Escape key
                break

            commander.publish_joint('joint1',target_joint1)
            commander.publish_joint('joint2',target_joint2)

            print("joint1",target_joint1,"joint2",target_joint2)
            time.sleep(0.01)

    except KeyboardInterrupt: # Ctrol-cでエラーにならないように
        pass

    rclpy.shutdown()
    thread.join() # スレッドが終了するまで待つ
    print('End')
実行
- AIロボット入門のDockerイメージを使うことが前提
- simple_arm
- パッケージの作成
$ cd ~/happy_ws/src$ ros2 pkg create --build-type ament_python --node-name simple_arm simple_arm
- コードの作成
- 上のソースコードをコピペして以下のファイルを作成する.
~/happy_ws/src/simple_arm/simple_arm/simple_arm.py
- 上のソースコードをコピペして以下のファイルを作成する.
- ビルド
$ cd ~/happy_ws$ colcon build
- 実行
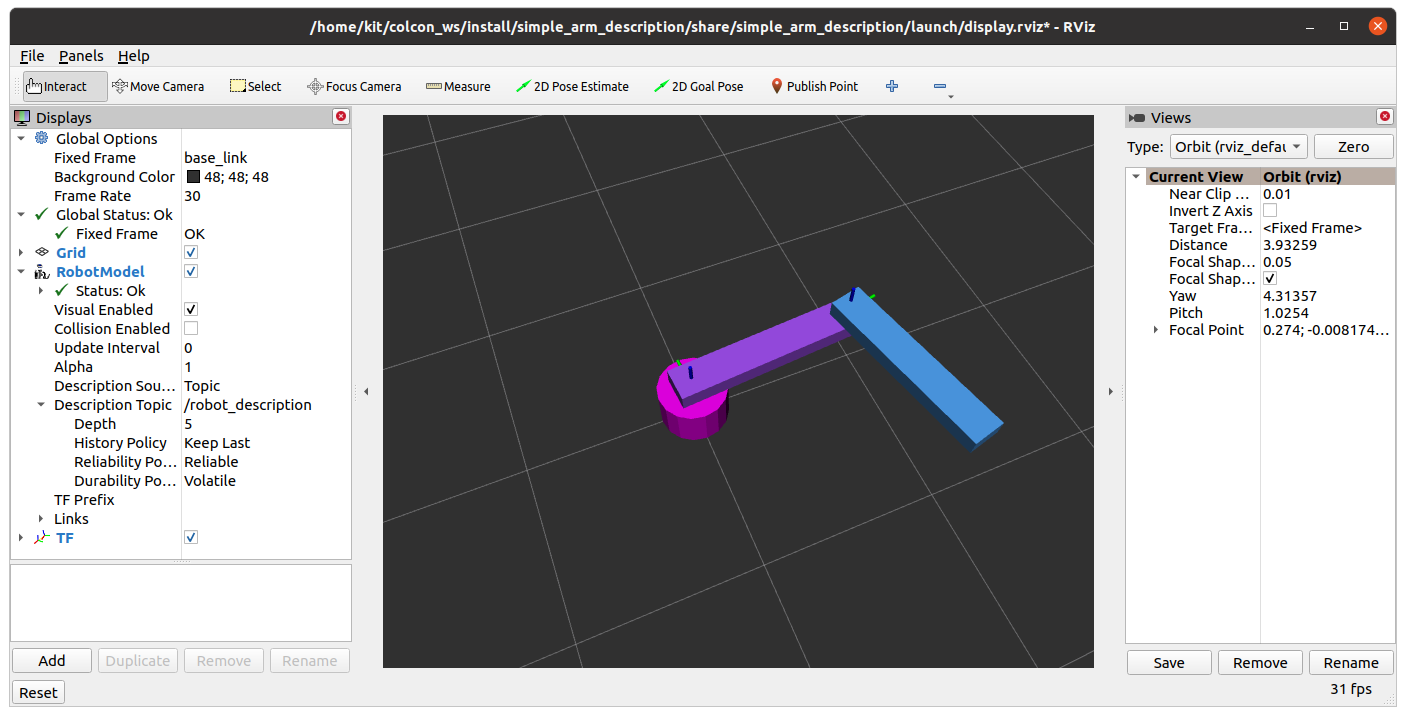
- RVizの起動
$ ros2 launch simple_arm_description display.launch.py
- simple_armノードの起動
$ source ~/happy_ws/install/setup.bash$ ros2 run simple_arm simple_arm
- RVizの起動
- 遊び方
- Joint State Publisherウインドウ右上の×印を押して,Joint State Publisherを終了させる.これをしないとsimple_armノードが動かない.

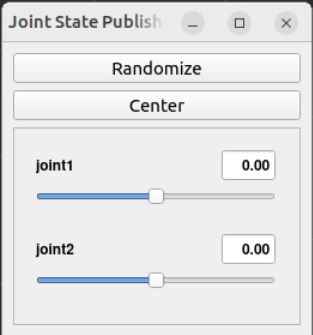
- 1,2,3,4キーを押すと関節が回転してロボットアームが動く
- Spaceキー:初期姿勢
- パッケージの作成
終わり

コメント