
Jetson XavierでTurtlebot2を動かそうと思ったところ、Xavierに対応しているOSはUbuntu18.04、ROSはMelodic。製造元のYujin RoboticsはMelodicに対応しているパッケージを出していない。いろいろ調べたところ、Melodic用にTurtlebot2の関連パッケージのインストール方法を次の参考サイトで公開している方がいたので、それに従ってインストールしたらTurtlebot2が動くようになった。以下はその作業メモ。ROSのMelodicはインストール済みが前提。
作業手順
- 作業スペースの作成(なければ)
$ source /opt/ros/melodic/setup.bash
$ mkdir -p ~/catkin_ws/src
$ cd ~/catkin_ws/src
$ catkin_init_workspace - Turtlebot2関連パッケージのインストール
- $ cd ~/catkin_ws
- $ curl -sLf https://raw.githubusercontent.com/gaunthan/Turtlebot2-On-Melodic/master/install_basic.sh
- 上のコマンドで~/catkin_ws/srcにkobuki_msgやturtlebotのディレクトリが作られない場合は、以下のコマンドを実行する。
- $ cd src
- $ git clone https://github.com/turtlebot/turtlebot.git
- $ git clone https://github.com/turtlebot/turtlebot_msgs.git
- $ git clone https://github.com/turtlebot/turtlebot_apps.git
- $ git clone https://github.com/turtlebot/turtlebot_simulator
- $ git clone https://github.com/yujinrobot/kobuki_msgs.git
- $ git clone https://github.com/yujinrobot/kobuki.git
- $ mv kobuki/kobuki_description ./
- $ mv kobuki/kobuki_node ./
- $ mv kobuki/kobuki_keyop ./
- $ mv kobuki/kobuki_safety_controller ./
- $ kobuki/kobuki_bumper2pc ./
- $ rm -rf kobuki
- $ git clone https://github.com/yujinrobot/yujin_ocs.git
- $ mv yujin_ocs/yocs_cmd_vel_mux yujin_ocs/yocs_controllers .
- $ rm -rf yujin_ocs
- $ sudo apt-get install ros-melodic-kobuki-* -y
- $ sudo apt-get install ros-melodic-ecl-streams -y
- $ cd ~/catkin_ws
- 次のコマンドでビルドする。
- $ catkin_make
- ジョイステックのパッケージjoyをインストール
- sudo apt install ros-melodic-joy
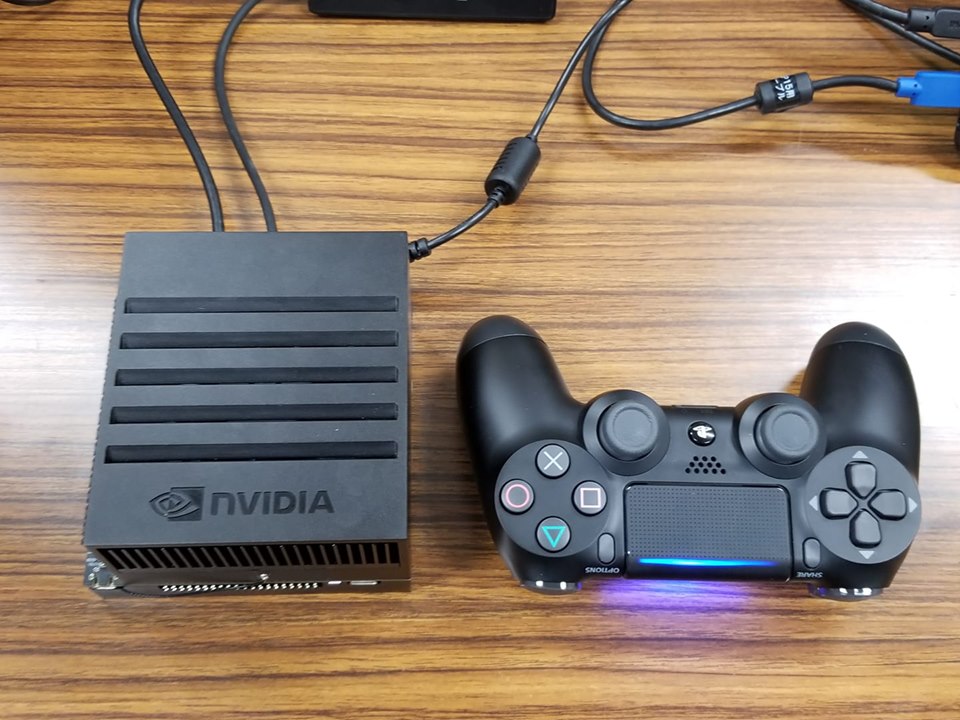
- SONY DualShock4 (DS4)コントローラの設定
- 以下のサイトを参照
- ds4drvドライバのインストール。ds4drvはLinuxのSONY DualShock 4 用ドライバ。
- sudo pip install ds4drv
- DS4とXavierのペアリング
- 次のサイトを参考にしました。
- ds4drvの起動
- $ sudo ds4drv
- 以下のように表示される。
[info][controller 1] Created devices /dev/input/js0 (joystick) /dev/input/event8 (evdev)
[info][bluetooth] Scanning for devices
- ペアリング
- SHAREボタンとDSボタンを同時に5秒程度長押しする。LEDが白く点滅したらボタンから手を話す。
- LEDが青くなりds4drvを起動した端末で以下のように表示されたら成功。
[info][bluetooth] Found device
[info][controller 1] Connected to Bluetooth Controller
[info][bluetooth] Scanning for devices
[info][controller 1] Battery: Fully charged
- PS4コントローラのROSパッケージps4_rosの導入
- サイト
- https://github.com/solbach/ps4-ros
- インストール
- cd ~/catkin_ws/src
- git clone https://github.com/solbach/ps4-ros.git
- launchファイルの変更
- ~/catkin_ws/src/ps4-ros/launch/ps4.launchの下から3行目を以下のように変更する。Turtlebot2が動くようにTopic名を変更する。
<param name="pub_topic" value="/cmd_vel_mux/input/teleop"/
- ~/catkin_ws/src/ps4-ros/launch/ps4.launchの下から3行目を以下のように変更する。Turtlebot2が動くようにTopic名を変更する。
- サイト
エラー処理
- 私の環境ではcatkin_makeをしたところエラーが出たらの一つずつ解決した。
- opencv関係のエラーが出たのでopencvをインストール。方法は以下のJetsonHacksの記事に従った。
- cv_bridgeがないと怒られる。Could not find the required component ‘cv_bridge’
- sudo apt install ros-melodic-cv*
- iamge_geometryがないと怒られる。Could not find the required component ‘image_geometry
- sudo apt instal’l ros-melodic-image-geometry
- depth_image_procがないと怒られる。Could not find the required component ‘depth_image_proc’
- Could not find the required component ‘depth_image_proc’
起動
- source ~/catkin_ws/devel/setup.bash
- roslaunch turtlebot_bringup minimal.launch
キーボードによる遠隔操作
- source ~/catkin_ws/devel/setup.bash
- roslaunch turtlebot_teleop keyboard_teleop.launch
- 以下のキーボード操作によりTurtlebot2を操作する。詳細は端末にキー操作の説明が表示されるのでそれを参照。
- i: 前進
- u: 左前方向へ進む
- j: 左回転
- o: 右前方向へ進む
- l: 右回転
- m: 左後方向へ進む
- ,: 後進
- . 右後方向へ進む
- k: 停止
DS4による遠隔操作
- DS4とXavierのペアリングをする。操作方法はすでに説明済。
- $ roslaunch ps4_ros ps4.launch
- コントローラと接続したときにキャリブレーションが必要。L2とR2を同時に押すと以下のように表示される。Release L2 and R2と表示されたら指を話すとキャリブレーションが終了し、利用可能となる。
[ WARN] [1562730896.630287264]: Press L2 and R2 to calibrate: 0%
[ WARN] [1562730896.731446432]: Press L2 and R2 to calibrate: 5%
[ WARN] [1562730896.832234176]: Press L2 and R2 to calibrate: 10%
[ WARN] [1562730896.933098464]: Press L2 and R2 to calibrate: 15%
[ WARN] [1562730897.034052928]: Press L2 and R2 to calibrate: 20%
[ WARN] [1562730897.135351008]: Press L2 and R2 to calibrate: 25%
[ WARN] [1562730897.236488864]: Press L2 and R2 to calibrate: 30%
[ WARN] [1562730897.337511264]: Press L2 and R2 to calibrate: 35%
[ WARN] [1562730897.438300640]: Press L2 and R2 to calibrate: 40%
[ WARN] [1562730897.539139328]: Press L2 and R2 to calibrate: 45%
[ WARN] [1562730897.640097056]: Press L2 and R2 to calibrate: 50%
[ WARN] [1562730897.741000544]: Press L2 and R2 to calibrate: 55%
[ WARN] [1562730897.842041696]: Press L2 and R2 to calibrate: 60%
[ WARN] [1562730897.943081120]: Press L2 and R2 to calibrate: 65%
[ WARN] [1562730898.044020896]: Press L2 and R2 to calibrate: 70%
[ WARN] [1562730898.144871008]: Press L2 and R2 to calibrate: 75%
[ WARN] [1562730898.245700928]: Press L2 and R2 to calibrate: 80%
[ WARN] [1562730898.346876544]: Press L2 and R2 to calibrate: 85%
[ WARN] [1562730898.447959104]: Press L2 and R2 to calibrate: 90%
[ WARN] [1562730898.548941536]: Press L2 and R2 to calibrate: 95%
[ WARN] [1562730898.649878528]: Press L2 and R2 to calibrate: 100%
[ WARN] [1562730898.750981568]: Release L2 and R2
[ INFO] [1562730900.952626016]: Calibrated – Ready to use
以上

コメント