
Detectron2でカスタムデータセット学習のメモ。以下のDetectron2 Beginner’s Tutorialを和訳して説明を加えたもの。TutorialがGoogle Colabというクラウドサービスを使ったJupyterノートブックなのでローカルマシンで動くようにPythonスクリプトを少し変更している。
データセットの準備
- ここでは1クラスのみのThe balloon segmentation datasetを使う。Detectron2のModel Zooで利用できるCOCOデータセットで学習済みのモデルを使いBalloon segmentation datasetで学習する。なお、COCO(Common Objects in Context)は大規模な物体検出、セグメンテーション、キャプションのデータセットであるが、Balloon(風船)のデータは含まれていない。データセットをダウンロードして解凍する。
- $ cd ~/src/detectron2/datasets
- $ wget https://github.com/matterport/Mask_RCNN/releases/download/v2.1/balloon_dataset.zip
- $ unzip balloon_dataset.zip
- 以下のスクリプトを~/src/detectron2/myprog/balloon_train.pyとして保存する。
# balloon_train.py: modified the scripts as follows
# Dectron2 Tutorial.ipynb https://colab.research.google.com/drive/16jcaJoc6bCFAQ96jDe2HwtXj7BMD_-m5
# データセットがCOCOフォーマットなら以下のコードは次の3行で置き換えることができる。
# from detectron2.data.datasets import register_coco_instances
# register_coco_instances("my_dataset_train", {}, "json_annotation_train.json", "path/to/image/dir")
# register_coco_instances("my_dataset_val", {}, "json_annotation_val.json", "path/to/image/dir")

import os
import numpy as np
import json
import cv2
import random
from detectron2 import model_zoo
from detectron2.engine import DefaultTrainer
from detectron2.config import get_cfg
from detectron2.utils.visualizer import Visualizer
from detectron2.structures import BoxMode
from detectron2.data import DatasetCatalog, MetadataCatalog

def get_balloon_dicts(img_dir):
    json_file = os.path.join(img_dir, "via_region_data.json")
    with open(json_file) as f:
        imgs_anns = json.load(f)

    dataset_dicts = []
    for idx, v in enumerate(imgs_anns.values()):
        record = {}

        filename = os.path.join(img_dir, v["filename"])
        height, width = cv2.imread(filename).shape[:2]

        record["file_name"] = filename
        record["image_id"] = idx
        record["height"] = height
        record["width"] = width

        annos = v["regions"]
        objs = []
        for _, anno in annos.items():
            assert not anno["region_attributes"]
            anno = anno["shape_attributes"]
            px = anno["all_points_x"]
            py = anno["all_points_y"]
            poly = [(x + 0.5, y + 0.5) for x, y in zip(px, py)]
            poly = [p for x in poly for p in x]

            obj = {
                "bbox": [np.min(px), np.min(py), np.max(px), np.max(py)],
                "bbox_mode": BoxMode.XYXY_ABS,
                "segmentation": [poly],
                "category_id": 0,
                "iscrowd": 0
            }
            objs.append(obj)
        record["annotations"] = objs
        dataset_dicts.append(record)
    return dataset_dicts

def verify_dataset(dists_name):
    dataset_dicts = get_balloon_dicts(dicts_name)
    for d in random.sample(dataset_dicts,3):
        img = cv2.imread(d["file_name"])
        visualizer = Visualizer(img[:, :, ::-1], metadata=balloon_metadata, scale=0.5)
        vis = visualizer.draw_dataset_dict(d)
        cv2.imshow(dicts_name, vis.get_image()[:, :, ::-1])
        cv2.waitKey(2000) # wait 2000ms
        cv2.destroyAllWindows()

def train_dataset(dataset_name):
    cfg = get_cfg()
    cfg.merge_from_file(model_zoo.get_config_file("COCO-InstanceSegmentation/mask_rcnn_R_50_FPN_3x.yaml"))
    # cfg.merge_from_file("../configs/COCO-InstanceSegmentation/mask_rcnn_R_50_FPN_3x.yaml"))
    cfg.DATASETS.TRAIN = (dataset_name,)
    cfg.DATASETS.TEST = ()
    cfg.DATALOADER.NUM_WORKERS = 2
    cfg.MODEL.WEIGHTS = model_zoo.get_checkpoint_url("COCO-InstanceSegmentation/mask_rcnn_R_50_FPN_3x.yaml")  # Let training initialize from model zoo
    cfg.SOLVER.IMS_PER_BATCH = 2
    cfg.SOLVER.BASE_LR = 0.00025  # pick a good LR
    cfg.SOLVER.MAX_ITER = 300    # 300 iterations seems good enough for this toy dataset; you may need to train longer for a practical dataset
    cfg.MODEL.ROI_HEADS.BATCH_SIZE_PER_IMAGE = 128   # faster, and good enough for this toy dataset (default: 512)
    cfg.MODEL.ROI_HEADS.NUM_CLASSES = 1  # only has one class (ballon)

    os.makedirs(cfg.OUTPUT_DIR, exist_ok=True)
    trainer = DefaultTrainer(cfg)
    trainer.resume_or_load(resume=False)
    trainer.train()

if __name__ == '__main__':
    # Prepare the data set
    dataset_name = "balloon_train"
    dicts_name   = "balloon/train"

    for d in ["train", "val"]:
        DatasetCatalog.register("balloon_" + d, lambda d=d: get_balloon_dicts("balloon/" + d))
        MetadataCatalog.get("balloon_" + d).set(thing_classes=["balloon"])
    balloon_metadata = MetadataCatalog.get(dataset_name)

    # Verify the data set
    verify_dataset(dicts_name)

    # train
    train_dataset(dataset_name)
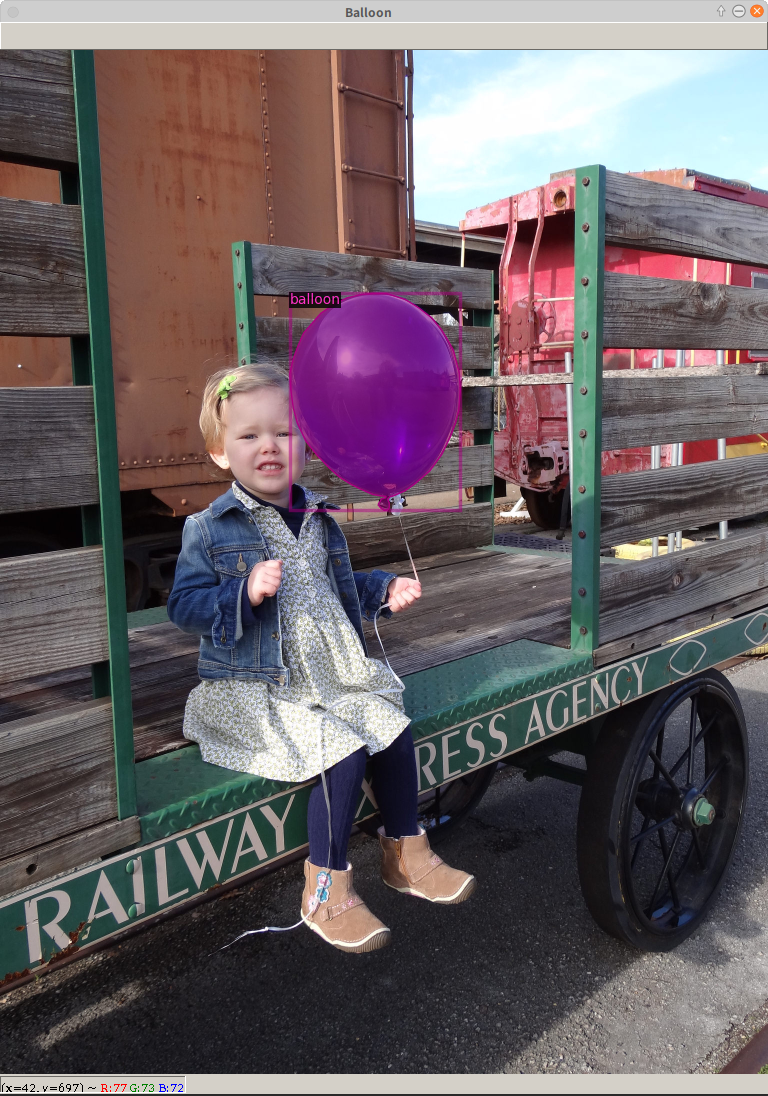
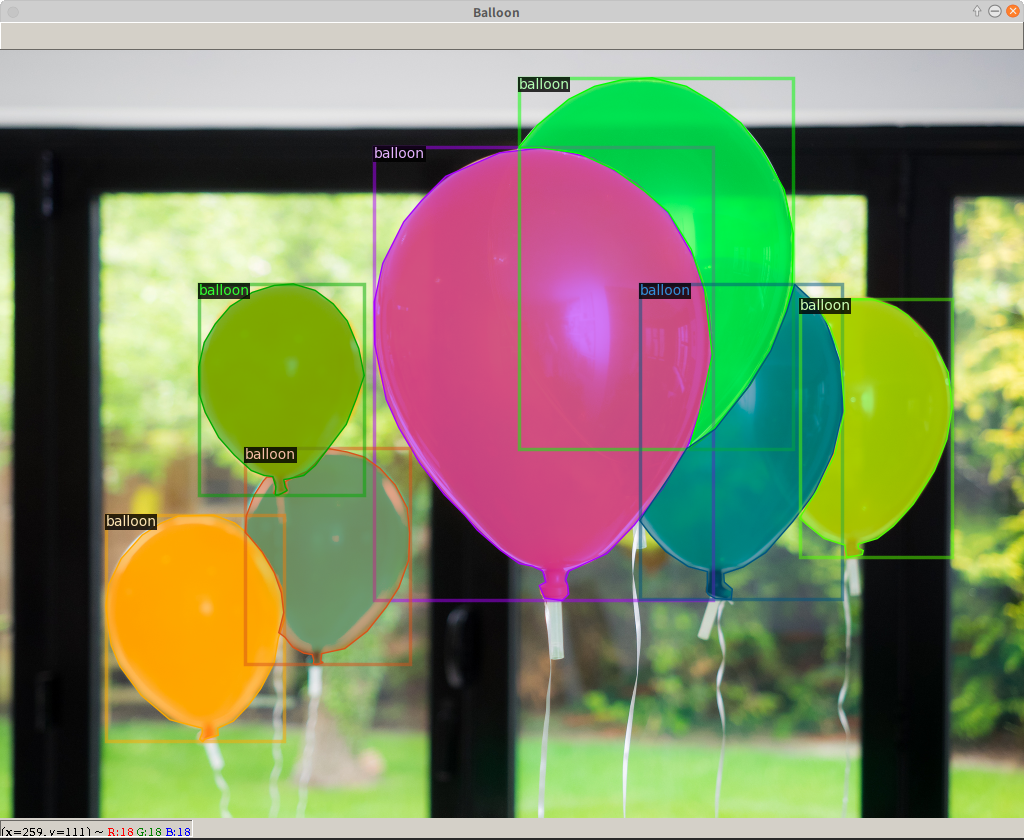
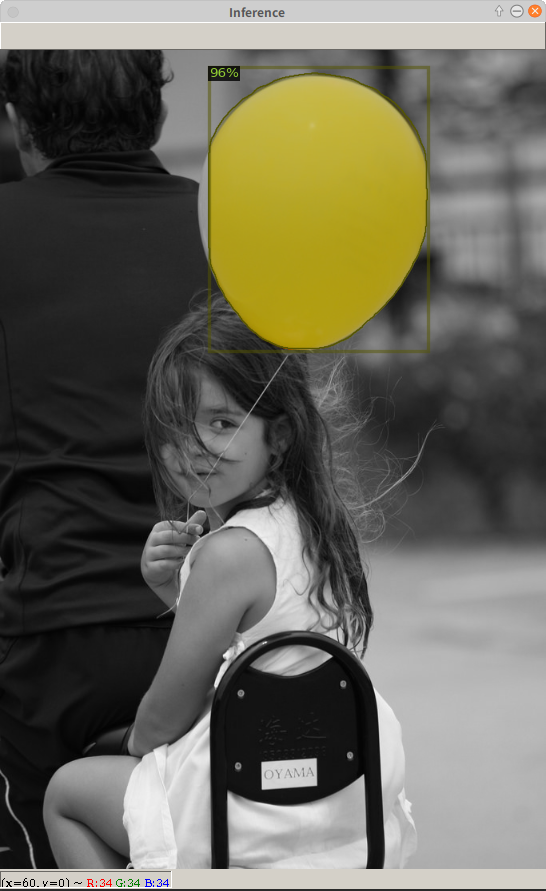
次のコマンドを実行すると、写真のような風船がアノテーションされたウインドウが開く。Enterキーを押すと次のウインドウが開き、全部で3枚表示される。その後、学習が始まる。
- $ cd ~/src/detectron2/datasets
- $ python3 ../myprog/balloon_train.py

学 習
- COCOデータセットで学習済みのR50-FPN Mask R-CNNモデルをBalloonデータセットでファインチューニングする。300回学習するのに、Google ColabのK80 GPUでは約6分、P100 GPUでは約2分かかるようだ。自分のGPU GTX1070 MAX Q搭載のノートPC(RAZER Blade 15)では2分38秒かかった。
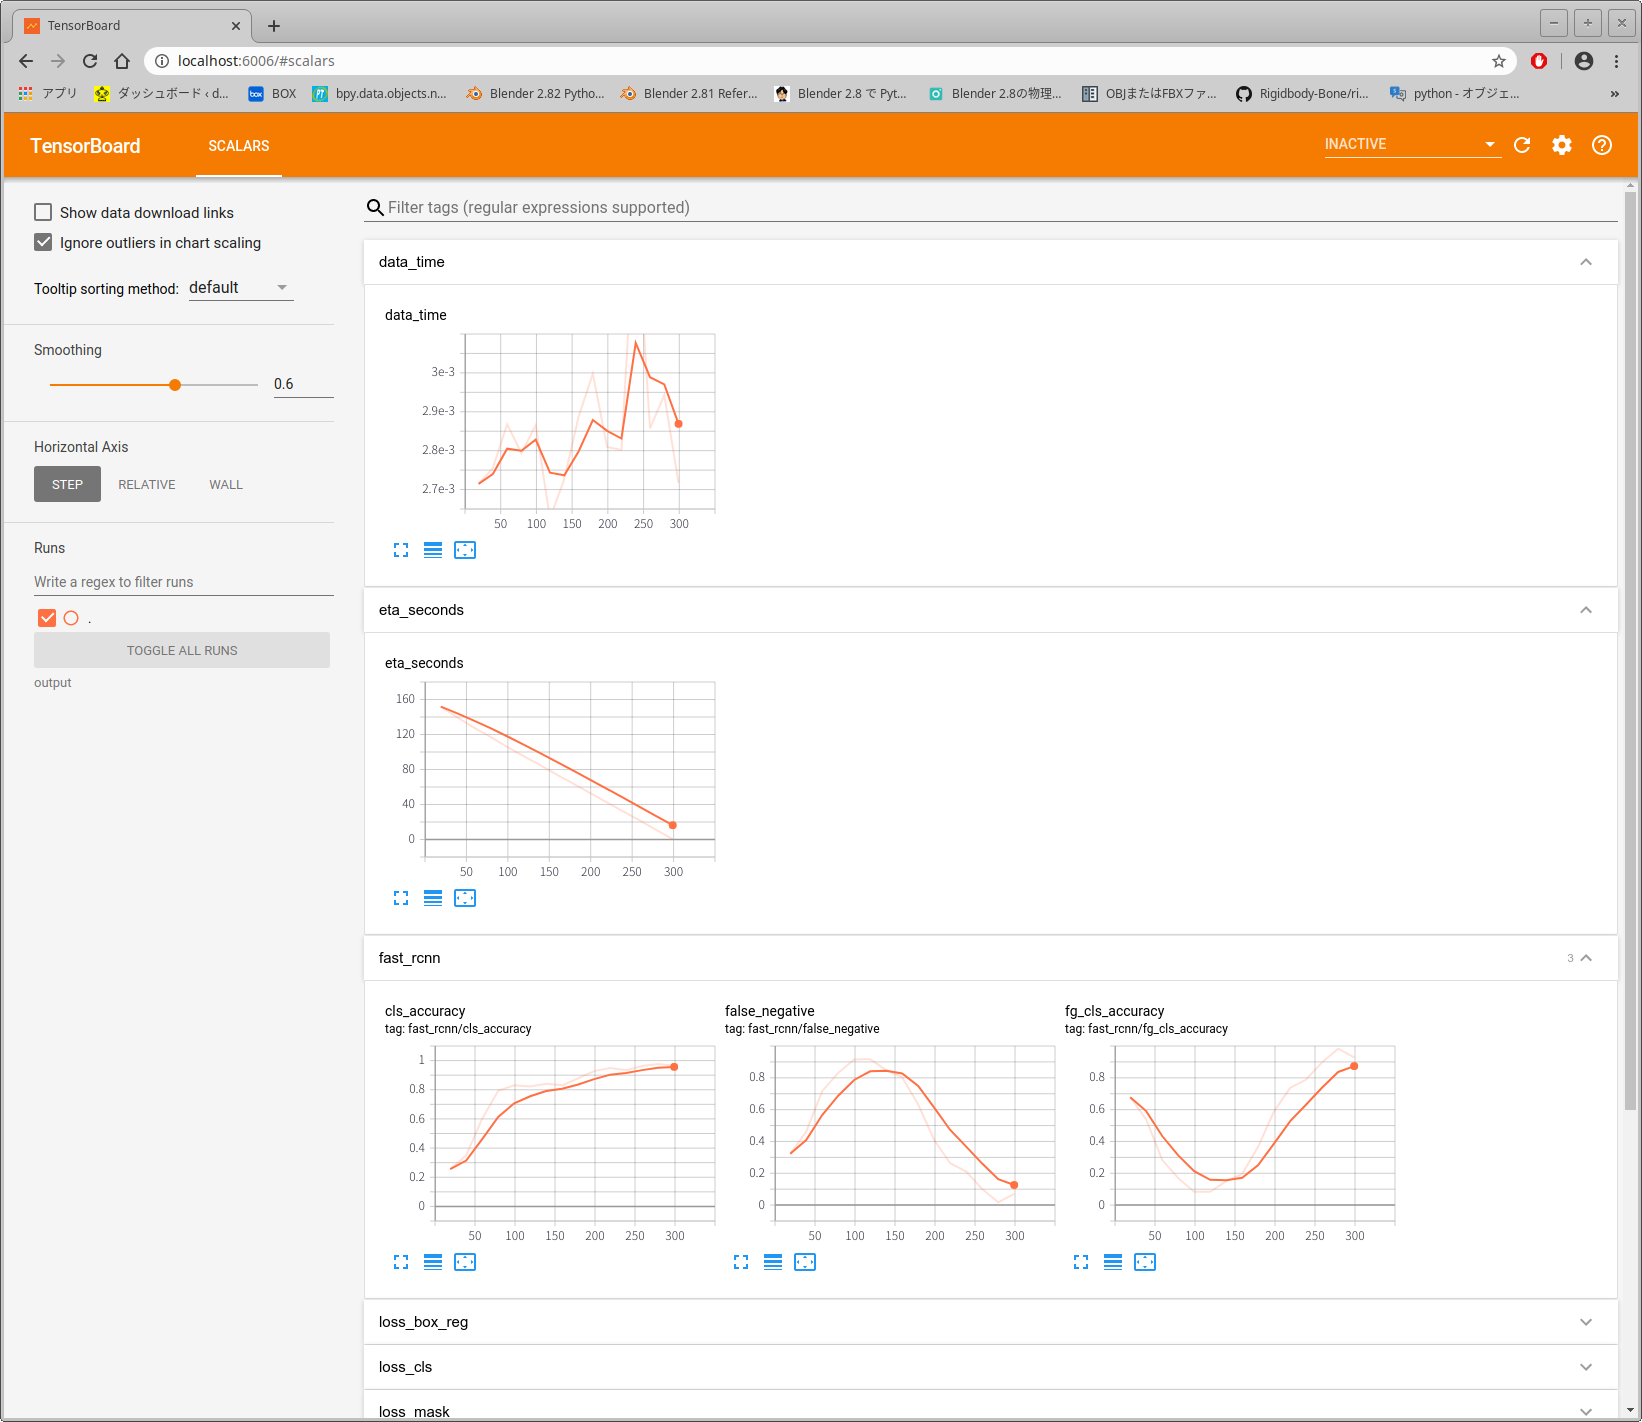
- 学習結果の可視化。学習が終了すると~/src/dectron2/datasets/outputにログが保存されるので以下のコマンドでTensorBoardを使い可視化する。
$ cd ~/src/dectron2/datasets$ tensorboard --logdir output- 実行すると次のように表示されるのでURLをブラウザにコピペすると、下のようなブラウザ画面になる。
- TensorBoard 2.1.0 at http://localhost:6006/ (Press CTRL+C to quit)
- 実行すると次のように表示されるのでURLをブラウザにコピペすると、下のようなブラウザ画面になる。
記事が長くなるので、推論は次のリンクをクリックしよう。
終わり
コメント