CVAT(Computer Vision Annotation Tool)ではカスタムDNNモデルによる自動アノテーション(オートアノテーション, Auto Annotation)ができる。この記事は以下の参考リンクをもとにOpenVINOの学習済みネットワークモデルをアップロードして、fruit-360データセットのtest_multipule_fruits(45画像)に自動アノテーションまで実施する。なお、参考リンクとは違うネットワークモデルを試している。
参考リンク
概 要
- CVATではOpenVINOのコンポーネントをインストールすると、以下の4つのファイルを用意するだけでカスタムモデルを使って自動アノテーションできる。とても便利な機能だ。
- Model config (*.xml) – ネットワーク構成が記述されたテキストファイル。拡張子はxml。
- Model weights (*.bin) - 学習済みのウェイトファイル(バイナリ)。拡張子はbin。
- Label map (*.json) – ラベルの番号とオブジェクトを対応させる簡単な json ファイル。拡張子はjson。以下はその例。なお、以下の実行例では、このmapping.jsonを使っている。
{ "label_map": { "0": "apple", "1": "orange" } } - Interpretation script (*.py) – ネットワークの出力層をCVATで処理できるように変換するPythonスクリプト。このコードはPythonのある限定された環境で実行される。ただし、 str, int, float, max, min, rangeなどの組み込み関数は利用できる。この記事では以下のスクリプト~/src/cvat/utils/open_model_zoo/mask_rcnn_inception_resnet_v2_atrous_coco/interp.pyを使った。詳細については参考リンクを参照。
import numpy as np
import cv2
from skimage.measure import approximate_polygon, find_contours

MASK_THRESHOLD = .5
PROBABILITY_THRESHOLD = 0.2

# Ref: https://software.intel.com/en-us/forums/computer-vision/topic/804895
def segm_postprocess(box: list, raw_cls_mask, im_h, im_w, threshold):
ymin, xmin, ymax, xmax = box

width = int(abs(xmax - xmin))
height = int(abs(ymax - ymin))

result = np.zeros((im_h, im_w), dtype=np.uint8)
resized_mask = cv2.resize(raw_cls_mask, dsize=(height, width), interpolation=cv2.INTER_CUBIC)

# extract the ROI of the image
ymin = int(round(ymin))
xmin = int(round(xmin))
ymax = ymin + height
xmax = xmin + width
result[xmin:xmax, ymin:ymax] = (resized_mask>threshold).astype(np.uint8) * 255

return result

for detection in detections:
frame_number = detection['frame_id']
height = detection['frame_height']
width = detection['frame_width']
detection = detection['detections']

masks = detection['masks']
boxes = detection['reshape_do_2d']

for index, box in enumerate(boxes):
label = int(box[1])
obj_value = box[2]
if obj_value >= PROBABILITY_THRESHOLD:
x = box[3] * width
y = box[4] * height
right = box[5] * width
bottom = box[6] * height
mask = masks[index][label - 1]

mask = segm_postprocess((x, y, right, bottom),
mask,
height,
width,
MASK_THRESHOLD)

contours = find_contours(mask, MASK_THRESHOLD)
contour = contours[0]
contour = np.flip(contour, axis=1)
contour = approximate_polygon(contour, tolerance=2.5)
segmentation = contour.tolist()

# NOTE: if you want to see the boxes, uncomment next line
# results.add_box(x, y, right, bottom, label, frame_number)
results.add_polygon(segmentation, label, frame_number)
実行例
- モデルの生成
- では、OpenVINO用に公開されている次のモデルを使って自動アノテーションしてみよう。
- mask_rcnn_resnet101_atrous_coco
- モデルのダウンロードに関しては以下の記事を参照。
- ダウンロードしたモデルから次の2つのネットワーク構成ファイルと重みファイルを使う。
- ~/openvino_models/public/mask_rcnn_resnet101_atrous_coco/FP32/mask_rcnn_resnet101_atrous_coco.xml
- ~/openvino_models/public/mask_rcnn_resnet101_atrous_coco/FP32/mask_rcnn_resnet101_atrous_coco.bin
- 残りのmapping.jsonとinterp.pyは以下を利用した。interp.pyは上で掲載したinterp.pyと同じ。
- mapping.json
- ~/src/cvat/utils/open_model_zoo/mask_rcnn_inception_resnet_v2_atrous_coco/interp.py
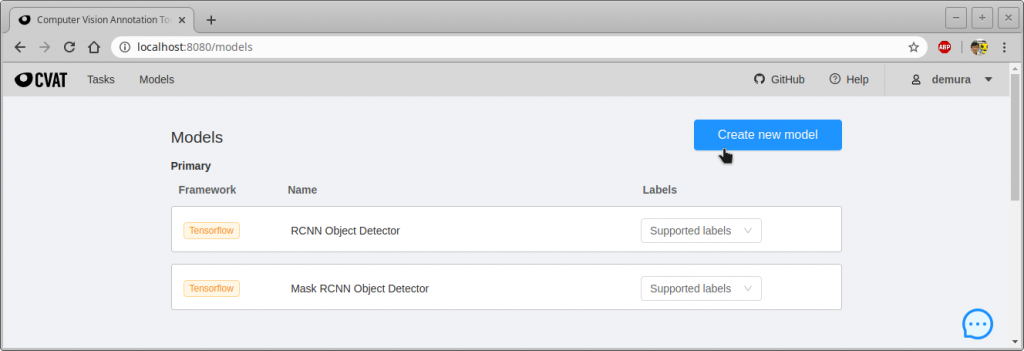
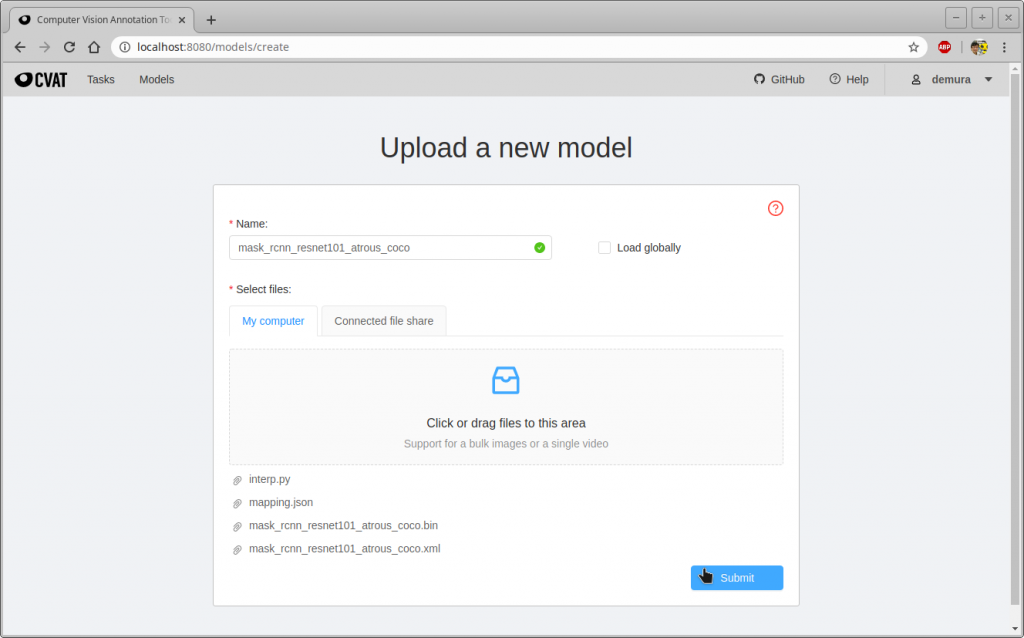
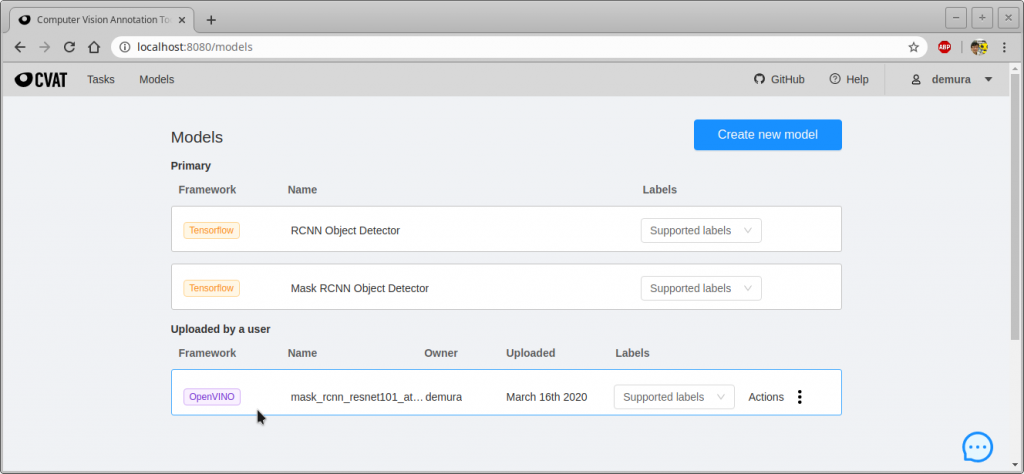
- では、上の4つのファイルを使ってモデルを作ろう。CVATを起動して、”Models”をクリック、”Create new model”をクリックする。
- では、OpenVINO用に公開されている次のモデルを使って自動アノテーションしてみよう。
-
- 以下のリンクを参考に、まず、アノテーションするタスクを生成する。
- CVAT: タスクの生成
- この例ではオートアノテーションをかけるデータセットとしてFruits 360 (Version 1)のtest-multiple-fruits(45枚)を用いた。次のリンクからダウンロードできる。
- Fruits 360 dataset
- ダウンロードしたfruits-360_dataset.zipを~/Downloadsに保存し、次のコマンドで展開する。
- $ cd ~/Downloads
- $ unzip fruits-360_dataset.zip
- 以下のリンクを参考に、まず、アノテーションするタスクを生成する。
- 自動アノテーション
-
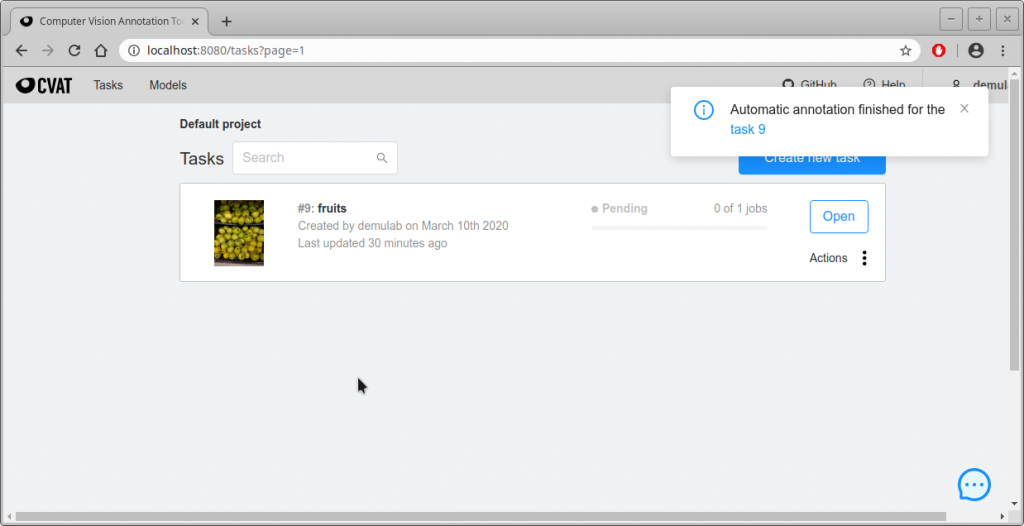
- Tasks画面から自動アノテーションしたいタスクのActions -> Automatic annotationをクリックする。
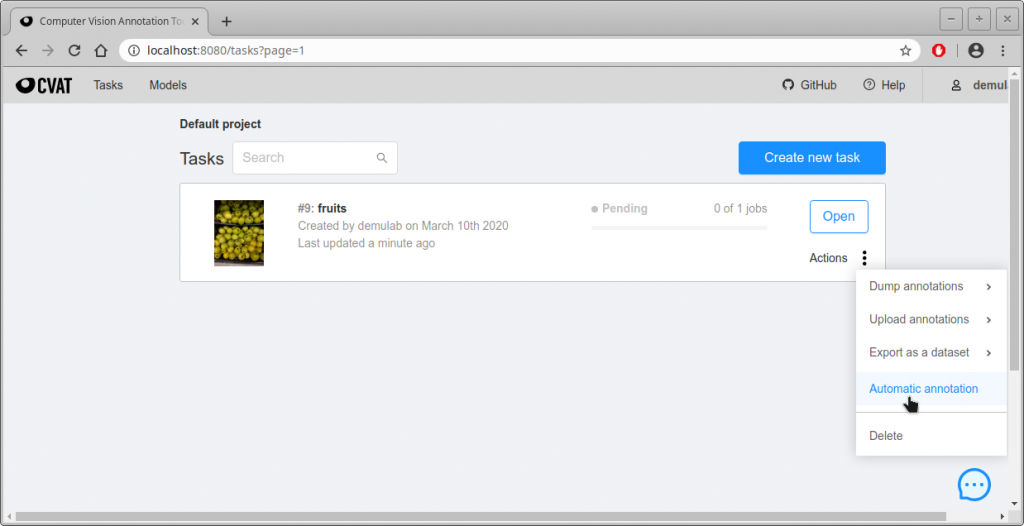
- Modelを選択する次の画面になるので、”Select a model”をクリックして好きなモデルを選び、自動アノテーションをかける。この例ではmask_rcnn_resnet101_atrous_cocoモデルを選択した。
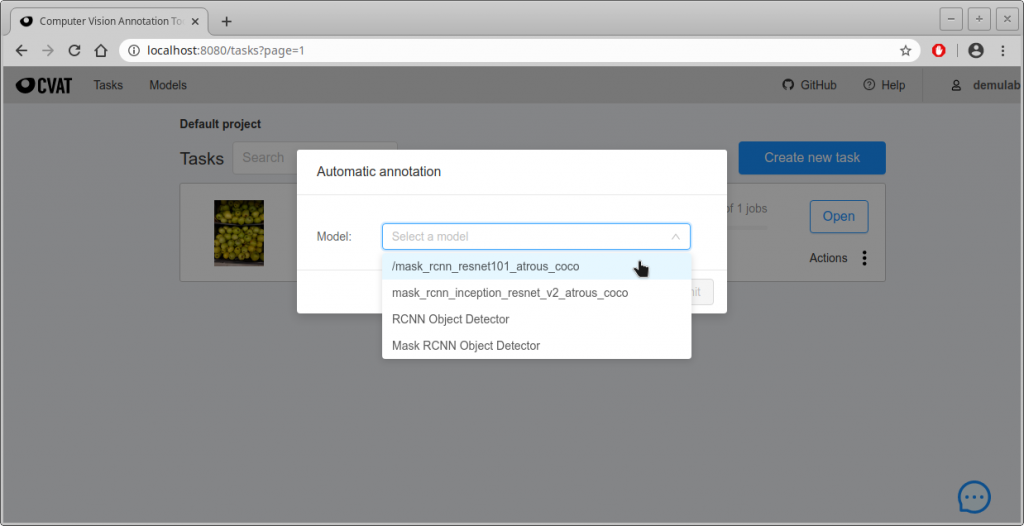
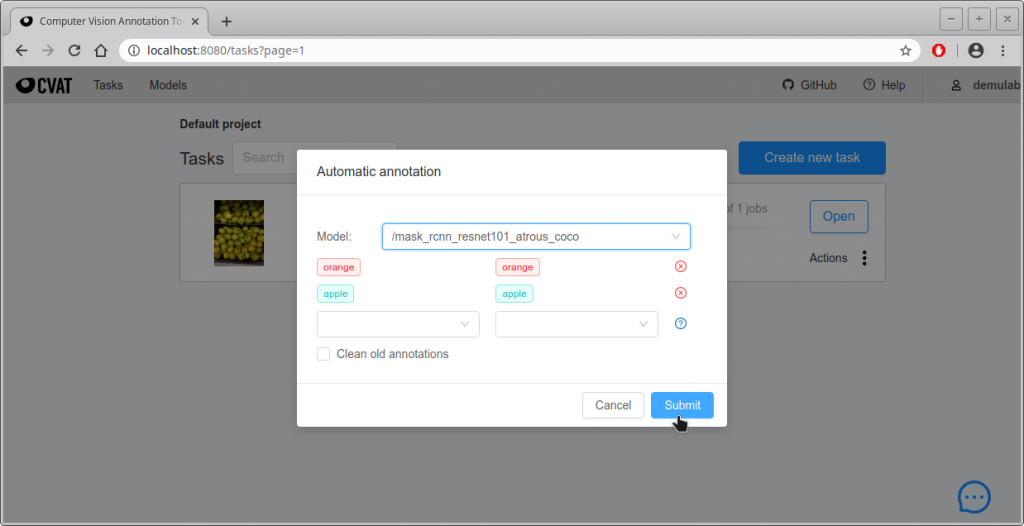
- 次の画面になるので、ラベルと認識結果の対応を確認して問題なければ”Submit”をクリックする。左列がmapping.jsonのクラス名、右列がTaskを生成するときに設定したラベル名。
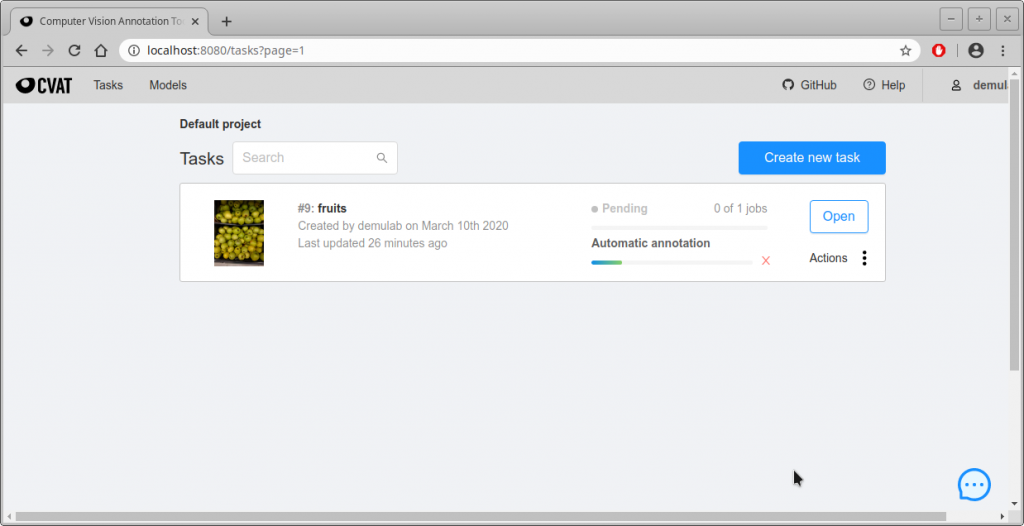
- 下のような画面になり、進行状況が緑色のプログレスバーで表示される。私の環境ではGPUを使わずに、46枚を自動アノテーションするのに約6分かかった。
- Tasks画面から自動アノテーションしたいタスクのActions -> Automatic annotationをクリックする。
- 結果の確認
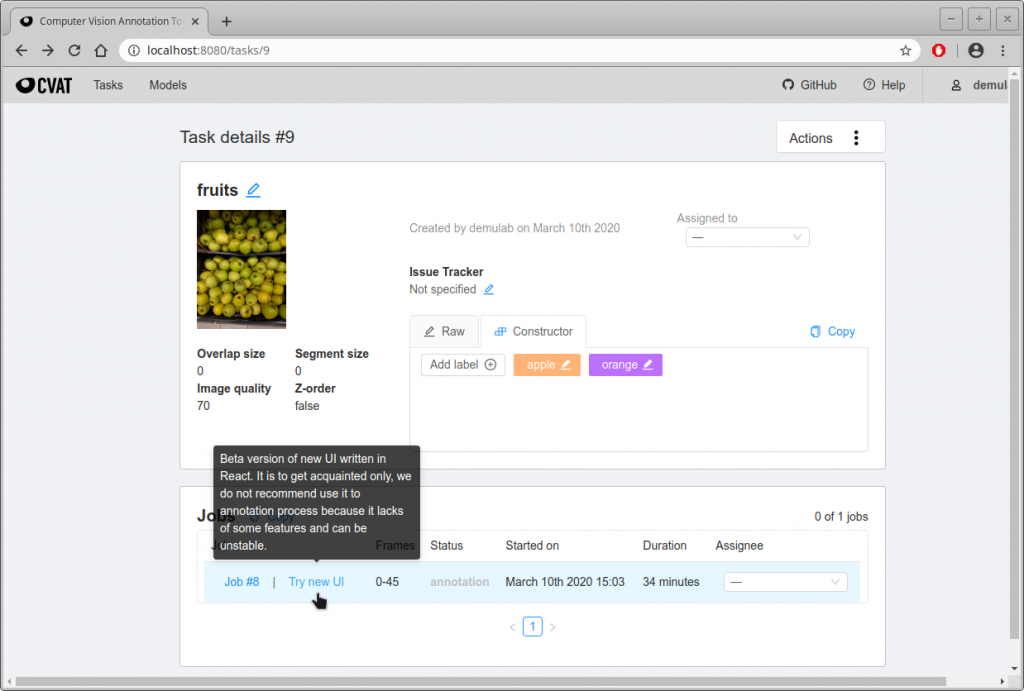
- では、自動アノテーション結果を確認してみよう。Tasksの”Open”をクリックする。
- 下画面になるので、一番したの”Try new UI”をクリックする。
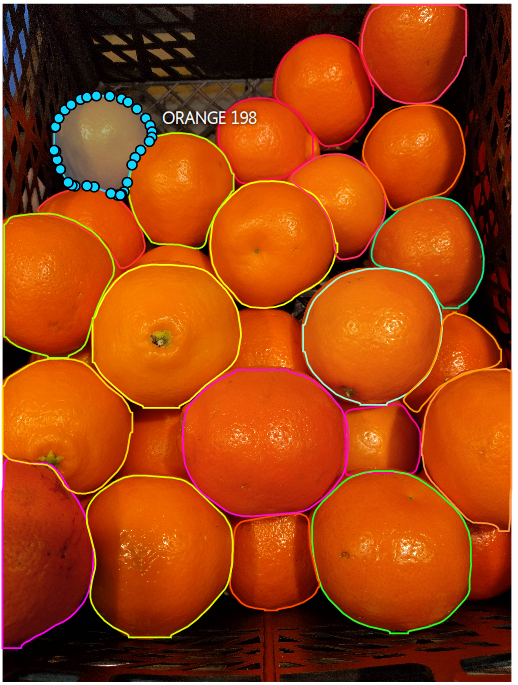
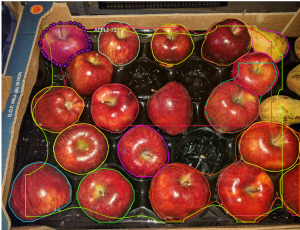
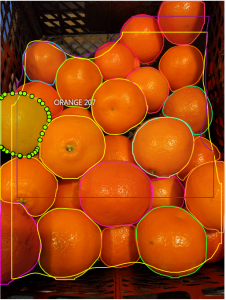
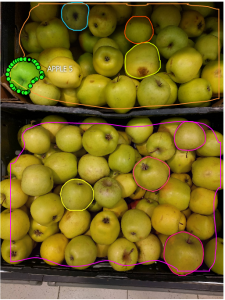
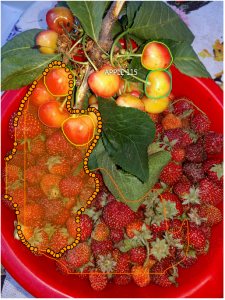
- COCOデータセットの学習済みネットワークで自動アノテーションかけた。当たり前だが、画像によって比較的うまくアノテーションをかけられているものもあれば、だめなものもある。サンプルを以下に示す。
- では、自動アノテーション結果を確認してみよう。Tasksの”Open”をクリックする。
- 所感
- オートアノテーションで全て済めば、そもそもDNNに学習させる必要はないが、うまく活用するとアノテーション作業にかけるリソースを大幅に削減できる可能性がある。深層学習に関する技術はここ数年で飛躍的に伸びているので、オートアノテーションで多くの場合済むようになると思う。
終わり

コメント