This page is mainly translated from http://demura.net/archives/9ode by Babel Fish Translation.
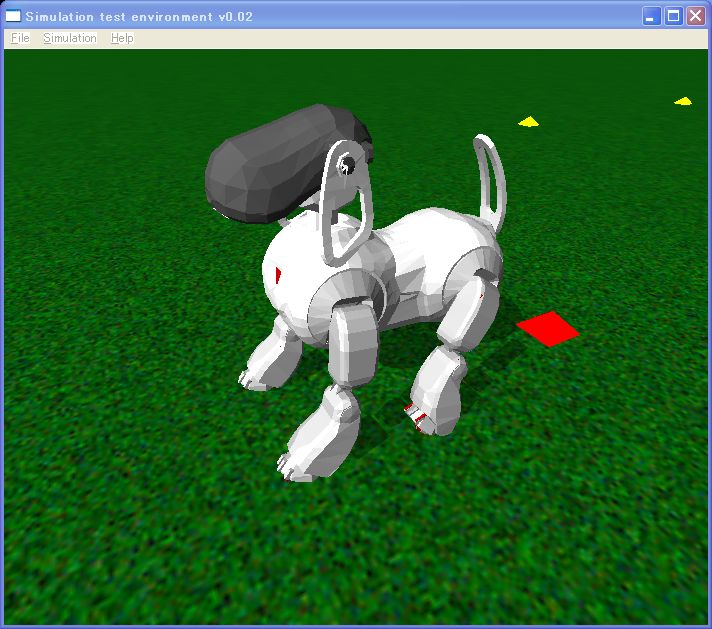
The AIBO simulator which was drawn up with ODE
4th of ODE tutorial as for time the installation with Linux will be explained.
From ODE 0.6, its build system changes and the method of installing mingw, Linux and OS X becomes basically same and it is simple. The compiling install it was possible from the source as for my environment to be a little old it is as follows.
Furthermore, if with the environment of OS X the version of gcc was not increased 4.0 or more, it could not install. With my environment splash.
Gcc 3.4.4
Automake 1.9.2
Autoconf 2.59
A. Download
Tracing download which tothe left menu barof the web sight of ODEis, it downloads ode-src-0.8.zip. You can aloso download ode-src-0.8.zip from here.In this tutorial, the file was downloaded into /tmp directrory.
B. Install
1. Please start a terminal soft, such as the gnome-terminal, xterm, and so on.
2. Move to the home directory
$ cd
3. Make the src directory and move there
$ mkdir src
$ cd src
4. Copy the ode source code under the src directory
$ cp /tmp/ode-src-0.8.zip .
5. Unzip the source code
$ unzip ode-src-0.8.zip
6. Move to the ode-0.8 directory
$ cd ode-0.8
7. The execution of configure. I recommend to install ODE with double precision.
$ . /configure –enable-double-precision
8. Compile the source code
$ make
9. Install the ODE library
$ su
$ make install
C. Test
$ cd ode/test (or , cd /home/$USERNAME/src/ode-0.8/ode/test)
$ . /test_buggy
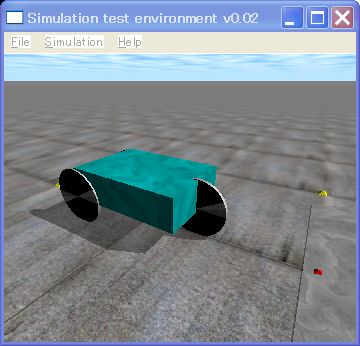
Screen shot of ODE attachment program test_buggy.exe
When the window of Simulation test environment v0.02 opens and the buggy is indicated, it is success. You can manipulate the buggy as follows.
| Key | Function |
| a | Increase speed |
| b | Decrease speed |
| , | steer left |
| . | steer right |
| space | reset speed and steering |
To be continued.
Update 2007-5-29

コメント
Hello,
Thank you for your comment.
I cannot provide the source code. The source code uses the AIBO 3D model by SONY which cannot be redistributed.
Sorry
demu
Hello, I’d like to ask you if it would be possible to obtain the source code of the aibo simulation that can be seen on the beginning of this page. I’ve been looking everywhere for a detailed aibo model in ODE and it would really help me a lot in my research if i could acquire it. Thank you very much.